Online:Vateshran Hollows
|
||||
|---|---|---|---|---|
| Discoverable | Yes | |||
| Zone | ||||
| The Reach | ||||
| Location | ||||
| South of the Reachwind Ritual Site | ||||
| Solo Instance |
||||
| Solo Only | Yes | |||
| Loading Screen | ||||
"Try not to cross paths with members of the Spiritblood Clan. They show a brutality in battle that even scares other Reachfolk. Whether a gift of their blood or their style of combat training, their warriors do not cease until they lay dead."—Valencia Pitio, Imperial Commandant
|
||||
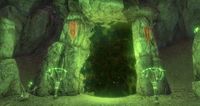
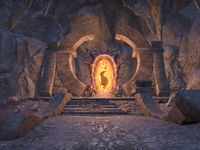
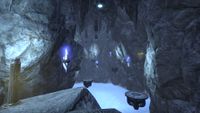
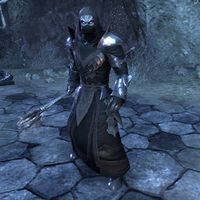
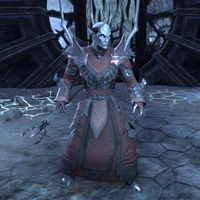
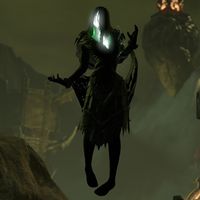
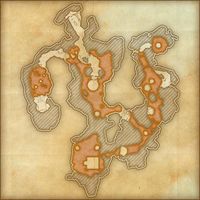
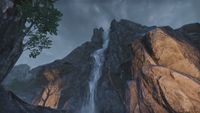
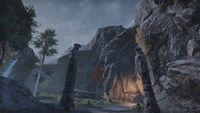
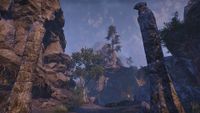
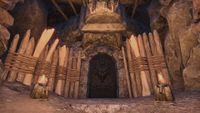
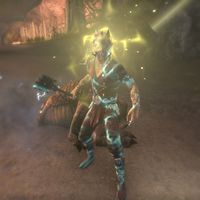
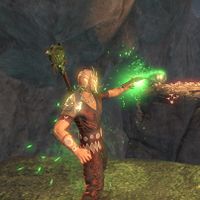
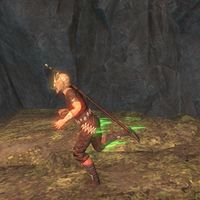
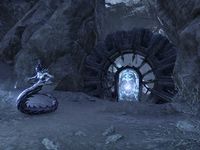
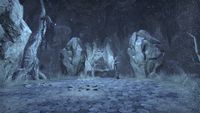
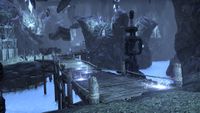
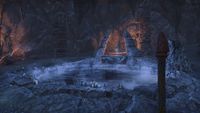
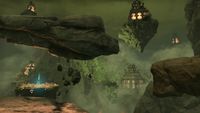
Vateshran Hollows is a solo arena in the Reach, south of the Reachwind Ritual Site. The Hollows are maintained by Reachfolk of the Spiritblood Clan and is currently overseen by the three sisters—the Rites Matron, the Binder in the Dark, and the Lamenter of the Slain.
Vateshran Hollows is where young clan members take on the challenging Vateshran Rites—a test of strength which will allow one to become a full member of the clan. The name of the rites comes from the term "vateshran": vateshrans are storytellers who sing their clan's songs. When a young warrior completes their Vateshran's Rites, they earn a song that tells of their triumph over the trials. Although the cavern itself is physically in the Reach, the veil between Nirn and Oblivion is thin here: realms of Oblivion leak into the cavern, allowing different otherworldly monsters to appear in the three wings where the rites themselves take place.
Vateshran Hollows serves as a solo trial where challengers must conquer three areas themed after three Daedric Princes: Hircine (Hunter's Grotto), Mehrunes Dagon (The Brimstone Den), and Molag Bal (The Wounding). The three wings can be done in any order, and the order they are completed affects your playthrough, as explained here.
After completing the three trials, the fourth and final wing (the Champion's Circle), will become available. Each wing has two bosses: after killing the first boss of a given area, you unlock a new traversal method that must be used to navigate the rest of the section. Should you need help in selecting which realm to start with, you can briefly confer with the spirit of Aydolan, the Spiritblood clan's first vateshran and the creator of the Vateshran's Rites.
When you defeat an enemy that blocks the way forward (these enemies are generally in front of barriers, which are only lowered after these elite enemies are defeated), all of the weaker enemies in the section preceeding them will despawn.
The enemies in Vateshran Hollows are not leashed, meaning that if you engage in combat with them, they will not return to their original post if you run far enough away. If you enter combat, expect those enemies to chase you to the ends of the map until either you are dead, they are killed, or the enemies are forced to despawn with the death of a guardian: for example, the trio of Dremora Kyngalds near the end of the Brimstone Den are fully capable of chasing you through the river of lava all the way to the secret boss if you aggro them.
Completing the final arena grants you a Vateshran Weapon.
Related Quests[edit]
- A Challenge of Worth: Accept a Spiritblood clansman's challenge.
 Vateshran's Rites: Partake in a local clan's rite of passage.
 Veteran Vateshran's Rites: Face the challenges of the Vateshran Hollows.
Characters[edit]
|
Bosses[edit]
This section will help you navigate to a specific boss without having to look over the table of contents. Each area has three bosses: the first boss (whose defeat grants you a traversal method), an optional secret boss (which can only be accessed with the help of a traversal method gained from a different wing), and the final boss of the wing, who must be defeated to clear the section and complete the objectives in the repeatable quest.
| Brimstone Den | Hunter's Grotto | The Wounding |
|---|---|---|
| Magma Queen | Shade of the Grove | Zakuryn the Sculptor |
| Mynar Metron | Leptfire Keeper | Xobutar of His Deep Graces |
| The Pyrelord | Rahdgarak | Iozuzzunth |
"Which Arena Should I Complete First?"[edit]
Defeating the first boss of each wing grants you a different traversal method: you'll receive a tool that can help you access secrets in another wing. The areas you explore after defeating the first boss of the wing will teach you how to use the traversal method you acquired. Each wing also has its own secret boss (which grants you a boon upon its defeat), as well as a buff you can acquire near the entrance of the realm if you have the proper traversal method from an arena you've already completed. Facing the secret bosses and acquiring the buffs are optional tasks.
The enemies in Vateshran Hollows get stronger as you clear each wing. For example: if you've cleared the Wounding and Hunter's Grotto, the enemies in the Brimstone Den will have more health and hit harder than they would if you had completed the Brimstone Den first.
Logically, this leads to one question: "Does it matter which order I complete them in?" The answer is yes, depending on whether you care about optional buffs or not.
- If you want a 10,000 point Stamina bonus, you need to complete the Brimstone Den before you complete Hunter's Grotto. The Brimstone Orbs gained from the Brimstone Den allow you to access the stamina boost and the optional boss in the Hunter's Grotto.
- If you want a 10,000 point Magicka bonus, you need to complete Hunter's Grotto before you run through the Wounding. The grappling bow you receive from the Hunter's Grotto allows you to access the magicka boost and the optional boss in the Wounding.
- If you want a 10,000 point Health bonus, you need to complete the Wounding before you run through the Brimstone Den. The Wounding Portals you attain by defeating Zakuryn the Sculptor in the Wounding allow you to access the health boost and the optional boss in the Brimstone Den.
The order in which you complete the three sections depends entirely upon your preference. If you want the Stamina and Health upgrades, complete the Wounding First, then do the Brimstone Den, then run through Hunter's Grotto. If you want the Magicka and Health upgrades, do Hunter's Grotto first, then play through the Wounding, then complete the Brimstone Den. If you'd like the Stamina and Magicka upgrades, complete the Brimstone Den first, Hunter's Grotto second, and the Wounding last.
Keep in mind that you cannot explore the secret in whichever wing you complete first: if you want to explore the river of lava within the Hunter's Grotto, but you completed Hunter's Grotto first, you will not be able to cross the river. If you'd like to benefit from the stamina bonus available within the Grotto or cross the lava to fight the Leptfire Keeper, you'll need to come back through on another run where you've completed the Brimstone Den first.
Layout[edit]
Hollows Threshold[edit]
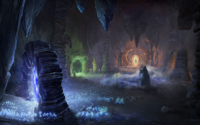
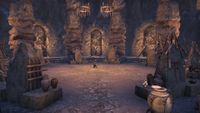
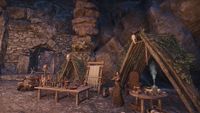
The Hollows Threshold is the entrance hall where the Rites Matron and the merchant reside. Spiritblood Champions await your arrival at the entrance to the threshold, where Caddgarn is standing. The Binder in the Dark lies to the east near the Daedric altars, and the Lamenter of the Slain lies to the west. Beside the merchant, there is a beehive, which contains honey, decorative wax or insect parts, as well as foodstuffs and provisioning ingredients. A few urns can be looted in the western chamber.
The Choosing[edit]
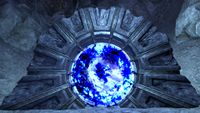
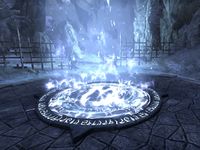
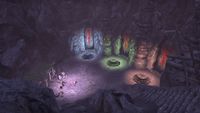
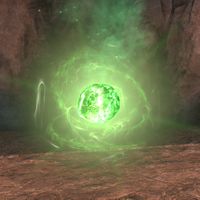
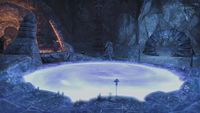
The Choosing is where you'll select which part of the arena you'd like to conquer first. Here, you'll meet Aydolan, your guide and the Spiritblood Clan's first vateshran. There are three portals in this room: the blue one (to the west) leads to the Wounding, the green one (to the north) leads to Hunter's Grotto, and the orange one (to the east) leads to the Brimstone Den.
After you conquer your first wing, strange motes of black energy will start appearing in this chamber.
Hunter's Grotto[edit]
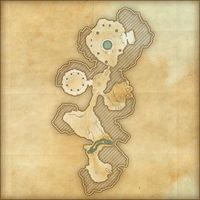
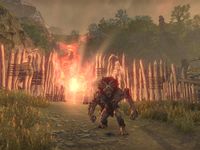
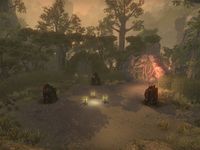
Hunter's Grotto is a lush forest filled with creatures called from Hircine's Hunting Grounds. Volcanic activity clashes with the bustling plant life.
|
|
|
The first path is linear: an alit, two spriggans and three fire shalks guard it. The Troll Gatekeeper (flanked by two fire shalks) guards the way forward, and must be defeated in order to progress. Any enemies that are left alive when the troll dies will disappear. Two Fetcherfly Hives and a fire shalk lie straight ahead. You can avoid them quite easily if you wish, but the single spriggan and two fire shalks beyond them are going to be a little harder to ignore. If you want to sneak past them, hug the barricade to the right.
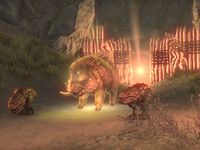
Up next is the Bristleback Gatekeeper, which is flanked by two alits. The beast is shrouded in a persistent yellow glow. A voice speaks to you from somewhere in the wood when you engage the boar: it tells you that the beast is under the grove's protection, and that you'll need the Shade of the Grove's blessing in order to harm it. Just then, a Blessed Spriggan will emerge nearby. Kill the Blessed Spriggan to gain the Blessing of the Grove, a buff that lasts for ten minutes. With this blessing, you can kill the Bristleback Gatekeeper. The first boss lies past the gate.
Buff: Essence of Endurance[edit]
Before you move on, you have the option of acquiring a buff. Head southeast of the bristleback down a flight of stone stairs, and you'll find yourself beside a ditch full of magma. If you've completed the Brimstone Den, you'll have access to Brimstone Orbs, one of which will appear along the bank of the lava river. Pop the orb and head northeast, down the river, and into a cave. There is a fallen pillar in the middle of the river with a Brimstone Orb on it: use the orb to refresh your invulnerability to fire, and continue down the river. A green mass of energy representing the Essence of Endurance is on a stone platform at the end of the cavern. Take it to receive your buff.
The Essence of Endurance raises your max stamina by 5000. Your max stamina will rise by 1000 points for each Endurance Remnant you collect. Your first Endurance Remnant can spawn atop the fallen pillar with the Brimstone Orb on it.
To absorb an Endurance Remnant (or any buff fragment within the Hollows), simply run into it.
Shade of the Grove[edit]
The first boss of this wing is the Shade of the Grove. You must defeat the three Spriggan Attendants in the center of the room to start the battle. The Shade of the Grove will possess one of three named Lurchers throughout the fight. You can tell when the boss is possessing a Lurcher if it has a yellow glow around it, similar to the Bristleback Guardian from earlier. The Lurchers share the same health pool. You must have the Blessing of the Grove to damage the Lurchers.
Blessed Spriggans will appear throughout the fight. Occasionally, one of the spriggans will snag you with a tether, attempting to reclaim the Blessing of the Grove. You need to interrupt it to prevent this from happening. Bashing the spriggan and using an ability that interrupts enemies (such as Crushing Shock for destruction staff users) are both viable options.
The boss will occasionally summon two Dire Wolves.
Each lurcher is themed after a different element:
Marbana can send lines of fire racing along the ground. This ability deals moderate flame damage. Marbana can also unleash a surge of flame after stomping on the ground.
Rofsuta causes AoEs to appear on the ground. These will deal poison damage over time if you stand in them. The boss will also fire thorns in a cone-shaped area in front of it. Rofsuta will not move while channeling this ability, similar to the Hedge Maze Guardian in Moon Hunter Keep. Block the ability or get out of the way to avoid taking damage.
- Earthen Blast
- Rofsuta will begin to channel a spell. If it hits you, you will be knocked back.
Saagranth can stomp on the ground, dealing physical damage in a conal radius in front of the boss. It can also charge up a water-based projectile, which slows you down if it hits you. The most important thing to watch out for is when Saagranth slams its fist into the ground. This causes an AoE tidal wave to rush outwards from where Saagranth is standing. This deals a lot of damage and knocks you back.
At 50% health, one of the lurchers will remain awake indefinitely, but will be invulnerable. This lurcher will just get in your way. Try to stay focused on the live lurcher. At 20% health, another lurcher will also awaken and become invulnerable. They can start to knock you around like a ping pong ball if you're not careful to stay out of their knockbacks, so be aware of your surroundings.
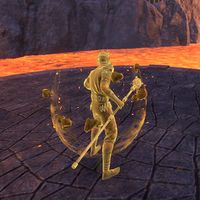
Defeating the first boss will unlock the Grappling Bow as a traversal method. The grapple bow allows you to access the Essence of Mysticism within The Wounding.
Secret Boss: Leptfire Keeper[edit]
To get to the secret boss of the Hunter's Grotto, head north instead of east after you defeat the Shade of the Grove. You'll end up on a cliff with a grappling point. Grapple up to the ledge to the west, then enter the lava filled cave. This path leads to the Leptfire Keeper. You'll need the traversal method from the Brimstone Den to cross the lava. If you've completed Brimstone Den, there will be a Brimstone Orb on the lava river's edge. Head south to reach a platform with another Brimstone Orb on it, regain your buff, then continue around the bend and head north. An Endurance Remnant can be on the platform with the second Brimstone Orb. You'll end up in a tunnel with glowing orange mushrooms lining the walls, which leads to a cave with a bottomless pit and six raised platforms with grapple points on them.
The Leptfire Keeper is a firemoth Nix-Ox. The Keeper will jump from one platform to the next on occasion, forcing you to chase after it. It can set on fire the platform it's standing on, which could be a problem if you're standing on the same platform while running on Veteran.
- Fire Spray
- The Keeper spins around in a circle and spews fire from its mouth. Deals moderate flame damage, and leaves AoEs on the ground which deal flame damage over time.
- Spitfire
- The Keeper spits a ball of fire at you, dealing flame damage.
- Shriek
- The Keeper screams at you, dealing flame damage and causing you to stagger.
Defeating the Leptfire Keeper grants you Empowered Grapple, which makes the Grappling Hook grant you a temporary speed bonus (known as Hunting Speed) when you use it. A chest containing your reward for defeating the boss will appear on the north side of the room. An Endurance Remnant can spawn on the northwestern platform and the northern platform, behind the Chest of Warriors.
Head back to the Shade of the Grove's boss area. You're going to want to take the northeastern path this time. Use the grappling bow to cross the waterfall. Here, you'll encounter three yellow Cliff Striders, which resemble the Molag Amur Cliff Strider pet. You can sneak around them by crouching close to the northern edge of the cliff, then hugging the wall. Enter the cave the Cliff Striders are guarding. At the first bend, you'll find three orange Salamanders. You can sneak around them by hugging the wall to the left, if you wish.
Beyond the Salamanders lies two red Dire Wolves and the Ogre Gatekeeper. You must defeat the Ogre Gatekeeper in order to move forward. A grappling section lies beyond them. Stand on the platform and aim at the grappling point on the ceiling above the bird statue to the right. Make sure you have a food buff active, and to wait before grappling to the next bird statue if you need to heal; you will take a bit of damage from falling onto the bird statue if you don't remain airborne by rapidly grappling from one point to the next. The next bird statue is to the west, and the third lies northeast of the second statue. Once you hit the third statue, simply aim straight ahead and grapple onto the wooden platform. After you pass under the stone arch, make a right turn to pick up your second Endurance Remnant.
There are four Cliff Striders up ahead. You can sneak around them by hugging the wall to the left. Your third Endurance Remnant is behind the pillar that lies beyond the Cliff Strider on the left, which is standing on its hind legs. There is another grappling section with bird statues beyond the Cliff Striders. Once you cross the chasm, you'll find yourself in a corridor with two Terror Birds and the Haj Mota Gatekeeper, the latter of which you need to kill to move on. Your fourth Endurance Remnant lies by the pillar straight ahead of you, beyond the terror bird on the right. The little camp guarded by the Haj Mota Gatekeeper is where you will respawn if you die to the boss, which is straight ahead.
Pick up your Endurance Remnant and head up the grappling section on the cliffs ahead. There are three grapple points on the side of the boss arena, which lead up to the boss. On the third platform, if you're collecting Endurance Remnants, hold a moment before grappling up to the boss. Instead of grappling right away, head straight and turn the corner to find your fifth and final Endurance Remnant. Now that you have a 10,000 point stamina bonus, use the grappling hook to soar up to the boss's platform. straight away, Rahdgarak unsheathes his weapon and snorts, challenging you; he's waiting for you to make the first move.
Rahdgarak[edit]
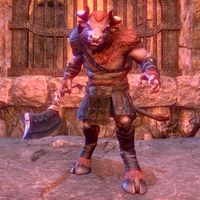
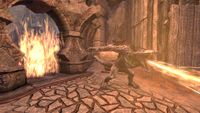
The final boss of this wing is a Minotaur named Rahdgarak. The arena is composed of four platforms: there are two pale blue ones and two red ones. There are grapple points on each platform, and a Reach Channeler (the blue ghosts) sits on the inner corner of each platform. Occasionally, the boss will jump to another platform, prompting you to follow. He can throw fireballs at you if you're not within melee range. If you jump to another platform, he will follow you. If you're in his way when he lands, you will be knocked down by the impact.
Occasionally, Rahdgarak will be surrounded by a wreath of orange energy or a shroud of blue mist (depending on which color platform you're on), and he will become invulnerable. On blue platforms, he summons two Moonlight Phantoms (which are dark grey), and on red platforms, he summons two Luminous Apparitions (which are bright yellow). He will remain invulnerable so long as he is on a platform whose color matches the energy he's empowered with. Grapple to an orange platform if he's empowered by frosty blue, and grapple to a blue platform if he's empowered by angry flames. Standing on a platform that is of the opposite color Rahdgarak is being empowered by removes his state of invulnerability.
The archers are very weak. Their most basic attack is to fire arrows at you, and they will use Arrow Stab in melee range. The archers will throw out elemental AoEs. Grey archers throw vials that leave a frosty mist on the ground. The yellow archers are arbalests: they'll shoot flaming arrows into the sky, which fall to the ground to create AoEs. You don't need to worry about the archers on normal, much less so if Hunter's Grotto isn't the third arena you decide to do that day. For the most part, you can ignore them, though it is quick and easy to burn them down. A ranged heavy attack will do the trick on normal.
Once Rahdgarak reaches 65% health, the Reach Channelers will stand up and begin performing a ritual. They start sending flames towards the platform they're facing (the flames from each channeler are sent diagonally, so the ghosts on blue platforms will send flaming AoEs to each other's platforms and vice versa). After 50 seconds of successful channeling, the mages will erect wards around themselves and set the platform across from them ablaze. Standing in this raging fire does immense damage to you. Make sure you grapple to a platform that isn't on fire.
So how do you prevent the platforms from burning? If left to channel their spells, the spirits will set the entire arena ablaze. You simply need to interrupt the Reach Channelers by bashing them. The Channelers will cast their spell for 50 seconds: this gives you enough time to grapple to each platform and interrupt each Channeler. After they're all interrupted, simply keep damaging the boss. Rinse and repeat every time they stand up and begin firing flames across the room from the tips of their staves. If you have the Empowered Grapple buff, simply grappling to the mages will interrupt them, allowing you to conserve stamina or magicka by not having to bash or use an ability.
Once you defeat the boss, a Warrior's Chest containing your reward will appear alongside a portal to the Choosing: you have successfully completed the Hunter's Grotto.
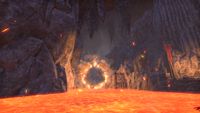
The Brimstone Den[edit]
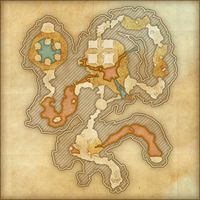
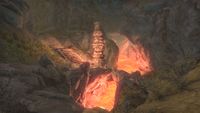
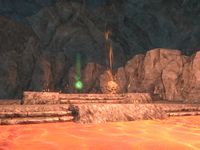
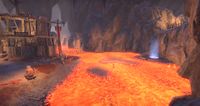
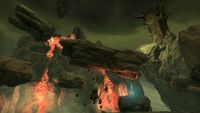
The Brimstone Den is a volcanic cavern where the minions of Mehrunes Dagon run free. Filled with lava and dotted with Daedric ruins, this wing is inhospitable for mortal life. Throughout the area, you may notice Dremora patrolling the battlements and scaffolding, Scamps dancing and raving in ruins, and Daedroths roaring from up high. All of these aesthetic creatures are out of reach; they build the scene and let you know that mortals hold no sway over this realm.
|
|
|
|
Buff: Essence of Fortitude[edit]
To reach the Essence of Fortitude, pass through the first hallway and head west, crossing the platforms over the river of lava, where two Flame Atronachs are frolicking. If you completed the Wounding, you have access to Wounding Portals, which will allow you to go up the cliff to reach the buff. The Essence of Fortitude increases your max health by 5000, and your max health is further increased by 1000 for every Fortitude Remnant you absorb. Your first Fortitude Remnant is back on the other side of the river of fire, on top of a stack of crates with a sheet draped over it. To absorb a Fortitude Remnant, simply approach it. You will absorb it automatically.
Your first flaming barrier is nearby, guarded by a Daedroth, which is accompanied by a Scamp. Drop it, then pass through the gate. A Clannfear, three Scamps and two Flame Atronachs lie on the path ahead. The Brimstone Warden guards the next barrier. The Warden is on fire and breathes fire consistently. Unlike other Daedroths, who sit still when they breathe fire, the Brimstone Warden will follow you and turn if you move while it's breathing fire. The first boss, the Magma Queen, is just up ahead. Your second Fortitude Remnant is in the little span of ruins between the Brimstone Warden's post and the Magma Queen's chamber. A Fortitude Remnant can also spawn northeast of the Brimstone Warden's post, on the lava river's shore.
Magma Queen[edit]
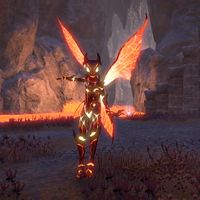
The Magma Queen is a fire pixie. She summons scamps through red portals, and conjures iron atronachs out of the nearby sea of lava. When the Scamp portals have spat out enough Scamps to disappear, a Daedroth will be summoned. Pay attention to the adds and burn them down so they don't overwhelm you. The iron atronachs are of some importance, so try to kill those last if you can.
Occasionally, the Magma Queen teleports, leaving behind a lava geyser. This geyser deals major flame damage over time, and aims specifically at you. This is where the iron atronachs come in handy: whenever you kill an iron atronach, it drops a flaming rock, which you can synergize to plug the geyser. Stand on top of the glowing yellow rock, synergize, then aim at the geyser and activate the ability to stop the incoming damage. Plugging a geyser temporarily stuns the Magma Queen and her adds.
When her health falls to 45%, walls of fire will appear from the sea of magma. They come from all sides, and travel in a straight line across the arena. Once you defeat the boss, a Warrior's Chest containing your reward will appear.
Traversal Method: Brimstone Orbs[edit]
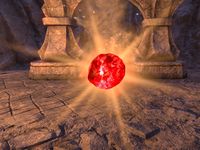
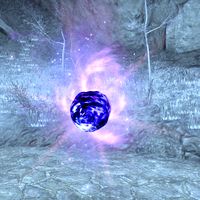
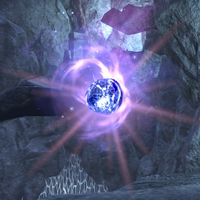
Defeating the Magma Queen grants you the ability to use Brimstone Orbs, which you need to access the Essence of Endurance in the Hunter's Grotto. One such orb appears at the southern end of the platform. Hit the Brimstone Orb to absorb it, gaining Brimstone Fortification. While Brimstone Fortification is active, you will be highly resistant to fire for 15 seconds. This allows you to walk over the lava without getting hurt. A fully charged heavy attack should suffice in popping the orb. In order to receive the buff, you need to be standing near the Brimstone Orb. If you heavy attack with your lightning staff from a ways away, you won't be in range, and you won't get the temporary buff, so you'll die if you try to walk in the lava. It takes 15 seconds for a popped Brimstone Orb to respawn.
A single flame atronach dances over the lava beyond the Magma Queen's corpse. A Daedric pavilion lies to the south. There are three Scamps and a Brimstone Orb on it. Defeat the Scamps if you wish, then hit the orb to restore your immunity to lava. Head east from the platform to progress. You'll come across a small stretch of dry land here. Your third Fortitude Remnant is just to your right as you hit this patch of land. A Daedroth accompanied by two Scamps blocks the way. Beyond is another portion of the river of lava. A Fortitude Remnant can also spawn on the eastern side of this barrier, along the rocky outcropping to the north of the Brimstone Orb.
A Brimstone Orb on the shoreline will allow you to progress. There is one flame atronach guarding the river. At the southeastern corner of the map, there is a platform containing a Brimstone Orb which is guarded by three Dremora Kyngalds. Here, you have a choice: you can head north towards the secret boss, or you can head west towards the final boss.
Secret Boss: Mynar Metron[edit]
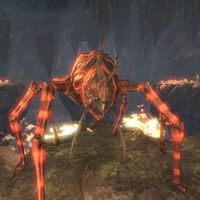
Head north from the southeastern corner of the lava river to get to the secret boss. The Brimstone Caretaker is a giant flaming bone colossus that has a lot of health, and wanders the river around the southeastern platform and the lava river to the north. It conjures flame AoEs. It can also summon two Skeletons (which explode and deal flame damage) or three Risen Dead. Make sure not to get overwhelmed by adds if you can help it. The Brimstone Caretaker isn't too complicated of an enemy to defeat, it just has a lot of health. You don't need to worry too much about it: you can avoid it entirely on your way to the secret boss.
You need to have access to the Wounding Portals from the Wounding to get to this boss. There are two platforms with Brimstone Orbs on this path. A Fortitude Remnant can spawn in the middle of the lava river (on the eastern side), between these two platforms. At the end of the path, there's a Brimstone Orb and a dais with a Wounding Portal on it. A Daedric archway with a barrier in it lies ahead, blocking the way forward. Enter the Wounding Portal. Your fourth Fortitude Remnant is to the right of the Daedric Pavilion up ahead. Absorb it, then climb the pavilion to reach the lever which will dispel the barrier.
After the barrier is dispelled, hit the Brimstone Orb and continue forward. Your Brimstone Orb will give you a buff that lasts long enough to carry you to the other side. It will run out just before you hit the other side, but don't worry! You'll hit dry land before you start to take any substantial damage. Your fifth Fortitude Remnant lies past the boss, sitting in the lake of lava behind Mynar Metron. There's a Brimstone Orb on the platform in front of the boss, so you'll need to hit that to reach the Remnant.
Mynar Metron, an iron atronach, is standing on a platform in the middle of a lake of lava. If you die, you will end up on the lake shore across from the platform; you won't need to run all the way back from the previous boss. You do not need to step foot in the lava during the battle; you only need to cross the lava to get to the boss's platform, and to get the Fortitude Remnant (should it spawn here).
Mynar Metron spends this fight at the perimeter of the island. The boss stands at the edge of the island in the lava, flinging fire at you. Mynar Metron does not climb onto the platform during combat, and this fight is easy compared to the Magma Queen. Mynar Metron will walk over to one side of the platform and splash lines of lava onto the shore, which deal moderate flame damage. These are very easy to avoid. There's only one ability you truly need to worry about, and that's blast furnace. After the boss uses this ability, it moves around the perimeter of the island, and doesn't move until it uses this ability again.
- Blast Furnace
- Mynar Metron stands still and spews lava from its chest cavity. It leaves flaming AoEs on the ground, which deal moderate flame damage over time if you stand in them. The boss sets a lot of AoEs down, so you might end up stepping in them, but you don't need to worry if you keep moving and try to get out of them as best you can. Each AoE lingers for about two seconds.
- Eruption
- Mynar Metron punches the ground, causes lava to spew forth. This deals moderate flame damage.
Once you defeat the boss, a Warrior's Chest containing your reward will appear, and you will gain a buff called Empowered Brimstone. Your Brimstone Fortification now radiates intense heat, damaging enemies that stand close to you. It does a good deal of flame damage, so be sure to make use of it if you have the chance. Now is a good time to pick up that Remnant.
The Pyrelord[edit]
Head southwest from that southeastern corner to head towards the Pyrelord. There is a platform right before his chamber containing three Scamps, a Dremora Kyngald, and a Brimstone Warden. You need to defeat the warden to move on. The Brimstone Orb in the middle of the platform will allow you to regain your lava-walking buff. A Fortitude Remnant can spawn in the lava to the left of the boss room's entrance.
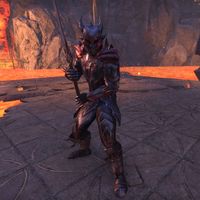
The Pyrelord is a Dremora. He is on the far end of a very large square platform, and is standing in front of a rather large pile of embers. There are two Oblivion Gate structures north and northwest of the platform. Fortitude Remnants can spawn on either of the Oblivion Gate platforms. Brimstone Orbs can spawn on the northeast, southeast and southwest corners of this platform, in the circular structures on the three corners.
- Quick Strike
- The Pyrelord strikes you with his greatsword, dealing moderate physical damage.
- Fire Breath
- The Pyrelord breathes fire, dealing moderate flame damage in a cone-shaped radius in front of him.
- Flame Spout
- The boss holds his blade aloft and shrouds himself in a flaming aura. There are three spouts of fire on the outside of this aura that spin, which deal major flame damage if you get hit by them. Keep moving in a circle around the boss to prevent being hit by this ability, and don't stand too close to the boss (read: in his orange shield), or else you'll take major flame damage over time. This ability can cause the burning effect. While the aura is surrounding the boss, fire balls are unleashed from the tip of his blade.
- Superheat
- The Pyrelord plunges his blade into the platform, causing magma to rise over most of the area. The initial blast deals major flame damage over time if you stand close to him. To keep yourself from burning to death, make sure you're close to the edge of the arena. The circular formation in the southwestern corner and the pit of coals to the west are safe spots where you can stand without burning. Alternatively, you can use the Brimstone Orb and absorb the flame.
- Ignite
- This damage comes from you standing in the lava after the boss uses Superheat. It deals low flame damage over time very rapidly.
- Burning Slice
- The boss swings his sword at you, dealing moderate flame damage.
At 70% health, the boss summons a Fire Colossus, which behaves much like the Brimstone Caretaker from earlier. He summons another Fire Colossus when his health falls to 30%.
If you allow the Pyrelord to ignite all 3 spouts of flame that spawn in the corners of the arena during the Superheat phase, the boss wreathes himself in fire, dealing major flame damage to you if you're close to him. When he emerges, his sword will be on fire, and he deals a bit more damage. His Quick Strike becomes Burning Slice. This self buff dissipates after a while.
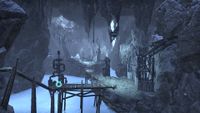
The Wounding[edit]
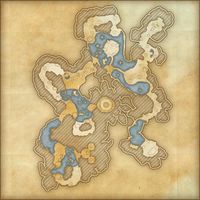
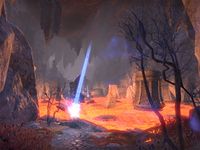
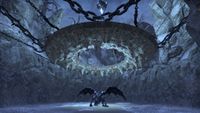
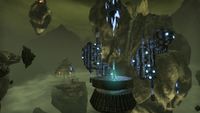
The wounding is a section inhabited by minions of Molag Bal. The environment is desolate, ashen and blue. Chains, strange black mechanisms and torture devices decorate the landscape. The Reachmen take their pain in stride. They don't lament their hardships; they endure them. The Reachfolk venerate Molag Bal because he brings nothing but unexpected pain. They grow resilient in his shadow.
|
|
|
|
Your foray into the wounding begins with an encounter against four Banekin and one Winged Twilight. Two more Winged Twilights and one Banekin block the second half of this tunnel. At the end of the first tunnel, you'll encounter a Harvester who must be defeated before you can move on. Two Winged Twilights, two Ogrim and one Banekin wander the path ahead. Another Ogrim wanders between the first half of the path and the second, and there are two Banekin frolicking off the path to the southeast. Before you go too far ahead, stop and consider whether or not you've completed the Hunter's Grotto.
Buff: Essence of Mysticism[edit]
If you have the grappling bow, head southeast of the iron gate once guarded by the Warden. There are two Banekin dancing by a cliff. There is a grapple point on the ceiling above a black platform with Molag Bal's face on it. Grapple over to that platform, then grapple over to the cliff south of the platform. At the end of the path, there is a chasm full of Azure Plasm, which is littered with grapple points. You'll want to grapple to the left, then right, then left, then right. On that last platform, grapple straight ahead to the point on the wall to the right, then grapple over to the cliff.
The Essence of Mysticism is on a stone dais, and increases your max magicka by 5000. Your max magicka is further increased by 1000 for every Mysticism Remnant you absorb. Grapple your way back to the main area and continue on the path towards the boss.
The next section contains a bridge wrought by crawling pools of electricity, which you must avoid. The electricity is easy enough to dodge. Before you reach the bridge, you'll come across two Banekin, which are jumping in front of black cages. The first Mysticism Remnant is behind the large boulder that lies south of these cages. A Winged Twilight is sitting near the end of the bridge. Another Harvester must be defeated to move on to the boss: Zakuryn the Sculptor and his Flesh Abomination.
Zakuryn the Sculptor[edit]
When you enter the boss arena, Zakuryn summons his construct, and the fight begins. Zakuryn will summon rifts and green portals from which Banekin will emerge. The Flesh Abomination is charged with lightning, and when it slams its mace into the ground, shock AoEs will begin to pop up around it.
At some point, Zakuryn will shield himself, making him invulnerable. You may notice that when the Flesh Abomination slams its electrically charged right arm into the ground onto a group of Banekin, those Banekin die in the explosion of crackling energy. This is a clue that tells you to lead the Abomination over to its master and goad it into hitting him. When Zakuryn is slammed by his own creation, he curses it, as his damage shield has been lowered. This is your cue to continue dealing damage to him.
Make sure to damage to the Abomination as well, as it won't die when Zakuryn does. After Zakuryn falls, the Abomination will stand idle for a few seconds before roaring, healing itself for most of its health bar and becoming enraged. The Abomination now deals more damage. This lasts until the beast is dead. You should deal as much damage as you can to the Abomination before its master dies, so it doesn't heal itself fully and kill you, ruining your hard work. The same goes for if the Abomination dies first: its essence will be absorbed by the boss, Zakuryn will regain half of his health bar and become enraged.
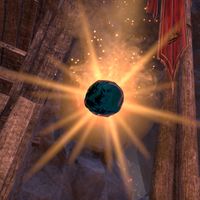
Defeating this boss grants you the ability to use Wounding Portals, which allows you to receive the Essence of Fortitude in the Brimstone Den.
Traversal Method: Wounding Portal[edit]
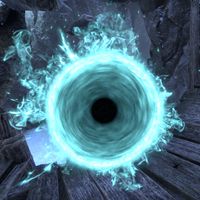
In order to begin moving forward, you need to synergize on the Wounding Portal that appears after Zakuryn dies. You'll find yourself in a corridor with five Banekin and two Watchers. The Watchers are racing up and down the path. At the end of the path is a chain which, when pulled, creates a bridge that leads you to the next area. You have twenty seconds to run to the end of the path and pull that chain. There are Amplify Sigils along the path that will grant you a brief speed boost and reset your timer to twenty seconds. If the timer runs out, you will be teleported back to the portal to use the synergy again. If you successfully pull the chain, you'll be teleported back to the portal, but you'll also have a way forward.
Your second Mysticism Remnant lies at the end of this first Wounding Portal path, upon a ledge to the left of the chain.
After you've completed your first Wounding Portal, a bridge will form on the southwest edge of Zakuryn's arena. Beyond the iron gateway lies two Banekin, a Winged Twilight, and a Xivkyn Hammerfist. Three Banekin and a Xivkyn Chillfiend lie further down the path, and beyond them is a Sentinel of Enfeeblement. If it sees you, its Glare of Enfeeblement will make your attacks do less damage. If you hug the wall to the left, you'll find your third Mysticism Remnant behind a large boulder. The second Wounding Portal is guarded by an Ogrim Behemoth. One Xivkyn Kynlurker patrols the beginning of the path. A Watcher rushes up and down the length of the path, and one Sentinel of Debilitation sits in the middle of the path. If the Sentinel sees you, its Glare of Debilitation will slow you down. Two Banekin and a Harvester guard the chain.
Once you've pulled the chain, cross the bridge to the south. Your fourth Mysticism Remnant lies south of where the bridge will form after you complete the next Wounding Portal. The fifth Mysticism Remnant lies to the right of the next Wounding Portal, which is to the southeast. The third Wounding portal contains four Banekin. A Xivkyn Hammerfist patrols near the beginning of the path, and a Sentinel of Vulnerability lies in the middle of the path. The Sentinel of Vulnerability's Glare of Vulnerability makes you take more damage. When you pull the chain at the end of the path, the bridge to the final boss forms.
Secret Boss: Xobutar of His Deep Graces[edit]
If you want to fight the secret boss, you need to head southwest instead of taking the third Wounding Portal. You'll find a cliff with more grapple points here. Grapple to the closest platform on the left, then head right. From here, head straight, then head east. Grapple to the last platform, then over to the cliff. There's a Wounding Portal at the end of the path. Synergize with it. Two Banekin loiter at the beginning of the path. At the end of the path, you'll find six Banekin and one Sentinel of Enfeeblement. Pull the chain to form the bridge that leads to Xobutar of His Deep Graces, the secret boss of the Wounding,
Xobutar of His Deep Graces is a member of the Coldharbour Elite Guard. He wears a pair of red banners on his shoulders, and makes the same droning sound that his kin emit in the Imperial Sewers.
When the battle begins, he summons a Mimic and teleports behind one of the sealed gates. You do not need to kill the Mimic, and it will stay in the central chamber for the whole fight. For the most part, you can ignore the Mimic and focus on Xobutar. The Mimic will serve you well in allowing you to build up Ultimate so you can drop everything on Xobutar when you get the chance. Ten seconds after the battle starts, the Wounding Portal at the western end of the room activates. Synergize with it to be brought to Xobutar.
- Daedric Chains
- The boss pulls you towards them with a blue chain made of magic, dealing magic damage. When you reach the boss, you will be stunned, and need to break free before the boss uses Force Pulse.
- Force Pulse
- The boss channels an AoE of blue necromantic energy. When it peaks, it explodes, dealing moderate magic damage.
- Entropic Bolt
- Fires a blue skull at the target, dealing low magic damage.
- Necrotic Swarm
- The boss holds his staff up, causing blue necromantic energy to flow forth from the top of it, dealing moderate magic damage. Daedric Shards occurs at this time.
- Daedric Resonance
- The moderate damage over time that occurs after a mote of necromantic energy hits you.
- Daedric Shards
- Lich crystals rise from the ground, exploding after one second. If you're caught in the AoE, you'll be hit by a blast of moderate magic damage.
Drop your Ultimates and AoEs on Xobutar when you enter his chamber. The first thing he usually does is he either hits you with his staff or immediately pulls you in with Daedric Chains to use Force Pulse. After he uses Force Pulse, he starts using Necrotic Swarm, which causes Daedric Shards to occur. At 55% health, Xobutar has a chance to summon two Vampiric Totems on the left and right sides of the room. If they remain standing by the time Xobutar is 80% through with Necrotic Swarm, they will disappear; each totem you didn't get rid of will restore 10% of Xobutar's health. He can restore up to 20% of his health if those totems are left standing. Furthermore, if you stand in their AoE, your own health will be sapped. You should focus on the totems whenever they come up.
Defeating Xobutar grants you Empowered Teleportation. The Empowered Sigil traps a Xivkyn soul under the influence of the player for a short duration: a Bound Chillfiend will assist you while you're trying to kill the Watchers upstairs during the fight against Iozuzzunth. If you disconnect and have to redo the wounding portals up from Zakuryn's arena again, the Bound Chillfiend will also help you fend off Daedra while you run through those. When you've brought Xobutar down, a Warrior's Chest appears with your reward inside.
Iozuzzunth[edit]
Iozuzzunth is the champion of the Wounding. For the most part, he uses normal Daedric Titan abilities. There is a Wounding Portal by the entrance to his arena. As combat continues, Watchers will spawn on the upper level. They will fire lasers down at you from the top of the arena. You need to kill them, otherwise you will be overwhelmed by lasers on top of the damage dealt by Iozuzzunth. The Watchers don't do a whole bunch of damage on their own, but it can be overwhelming if there's a lot of them.
You can use the Wounding Portal by the entrance to head upstairs. You have 20 seconds to kill as many Watchers as you can. They have relatively low health, so they shouldn't take too long to kill. If you stay too close to a Watcher for too long, it will try to knock you back downstairs early. Furthermore, Iozuzzunth is blasting cold fire into the air to rain down on the Watcher platform in an attempt to hinder your progress. The fire comes to rest on the platform as a ground AoE.
A Sentinel will spawn periodically to debuff you during the battle. You'll encounter a new type of Sentinel here: the Sentinel of Dissipation. These enemies drain your health. The easiest way to deal with the Sentinels is to stand in front of or behind them and wait for Iozuzzunth to unleash a wall of cold fire in their direction. This will damage the Sentinel severely, allowing you to hit it once or twice to destroy it for good.
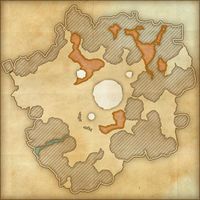
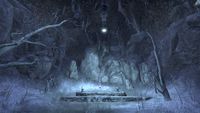
Champion's Circle[edit]
The Champion's Circle lies beyond the portal in the center of the Choosing, which activates after you clear all three wings. When you enter the Champion's Circle, you'll find yourself in a cave with Aydolan, who tells you that he's your final challenge. suddenly, Aydolan is consumed by magic, and a Voidmother named Maebroogha the Void Lich appears in his stead. She's the boss of this area, and she consumed Aydolan's spirit to cross over into this world.
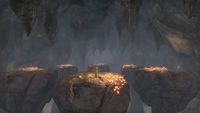
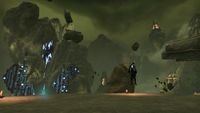
The cave explodes to reveal a border realm that melds the previous wings. There are three floating islands with grapple points on them, each decorated to resemble a wing from the Arena.
Maebroogha summons enemies associated with Namira.
- Shade
- Shade Colossus
- Void Archer
- Void Flameshaper
- Void Mage
- Void Rot (Veteran only)
Primary Loop[edit]
This fight has four phases. Your goal initially is to bring her down to 10% health. Once you do, she starts channeling Void Eruption, which is a one-hit kill. You need to use the grapple bow on one of the floating platforms and use the Void Step synergy on the glowing green and black portal to enter the Void. While you're in the Void, you'll need to kill a mini boss and deal with his adds. Once you kill the mini boss, a Void portal will appear on the edge of the arena, and you can return to Maebroogha to shave her health down more. You don't need to kill any of the adds to return.
- You need to kill the mini boss quickly, because Maebroogha will start to restore her health little by little while you're in the Void. If you take too long to kill the mini boss, she'll fill back up to 100%, and you'll have to burn her all the way back down again.
- Once you leave the Void, the adds you encountered there will follow you back to reality. For example: If you enter the Brimstone Den island's Void portal, the Void Flameshapers you encountered there will start to show up throughout the rest of the battle.
You'll need to bring her down to 10% health three times. You will enter the Void to fight a mini boss on each themed island. The mini bosses bear some resemblance to one of the bosses you fought in the island's respective wing The Wounding island has a Void Chillfiend (reminiscent of Zakuryn the Sculptor), the Hunter's Grotto has a Void Firehorn (reminiscent of Rahdgarak), and the Brimstone Den has a Void Dremora (which looks like The Pyrelord). You will be able to kill her on the fourth phase.
Other Important Mechanics[edit]
You may notice the four bound Shade Colossi surrounding the perimeter of the arena. Maebroogha will occasionally summon one of these to aid her. You can prematurely awaken them by hitting them with an ability, such as setting an AoE down next to them.
Occasionally, Maebroogha will summon a group of Shades which are linked together by a line of energy. This is the Void Tether, and touching it will kill you. The Shades are summoned at the edge of the arena, and will start to walk towards the center, closing in on you. You need to kill one of the Shades to create an opening in the circle of enemies. Focus your damage on one of them. This is key! Once you kill your chosen Shade, exit the ring of death and let them coalesce in the center. If the Shades reach the center with you inside, you will be killed by Void Trap, the explosion that occurs when the Shades reach the center and die. Touching the tether or allowing the Shades to box you in completely is a one-shot. You cannot mitigate this damage.
Sets[edit]
- The optional bosses and first boss in each portal can drop one of: Shoulders, Hands, Feet, or Waist.
- The final bosses in each portal can drop one of: Weapon, Legs, Chest, or Head.
- The final boss Maebroogha drops a Vateshran Weapon as well as one other piece of gear, including Jewelry from the Arena sets.
The following sets can found in the reward chest at the end of each Arena:
| Set Name | Bonuses | Armor Weight |
|---|---|---|
| Explosive Rebuke |
2 items: Adds 25-1096 Maximum Stamina |
Heavy Armor |
| Hex Siphon |
2 items: Adds 25-1096 Maximum Magicka |
Light Armor |
| Pestilent Host |
2 items: Adds 34-1487 Offensive Penetration |
Medium Armor |
- Normal weapons can drop from the last boss of the Arena on normal difficulty.
- The Perfected versions of the weapons only drop in Veteran Mode or can be awarded to players who successfully rank on the weekly Arena leaderboard.
| Set Name | Bonuses | Armor Weight |
|---|---|---|
| Executioner's Blade |
2 items: Hidden Blade deals up to 250% more damage to targets under 100% Health when you are standing behind them. Restores 1890 Stamina if the target was below 50% Health. |
Weapon |
| Perfected Executioner's Blade |
2 perfected items: Adds 12-526 Critical Chance |
Weapon |
| Force Overflow |
2 items: Casting Force Siphon on a target within 15 meters of you causes a surge of magical energy to tether between you for 10 seconds. While the tether persists and you remain in range, you and allies in the tether restore 4-175 Magicka and Stamina every 1 second. This effect can occur once every 10 seconds. |
Weapon |
| Perfected Force Overflow |
2 perfected items: Adds 20-877 Maximum Magicka |
Weapon |
| Frenzied Momentum |
2 items: While Momentum is active, casting Stamina abilities while in combat generates a stack of Frenzied Momentum for 20 seconds, increasing your Weapon and Spell Damage by 0-30 up to 10 times. After 5 or more stacks, your next Heavy Attack consumes all stacks and releases a violent explosion of energy around you, dealing 1084 Physical Damage to all enemies within 8 meters, scaling off the higher of your Weapon and Spell Damage. |
Weapon |
| Perfected Frenzied Momentum |
2 perfected items: Adds 20-877 Maximum Stamina |
Weapon |
| Point-Blank Snipe |
2 items: Increases your damage done with Snipe based on how close you are to your target. Max Damage: 33% at 3 meters. Minimum Damage: 5% at 18.5 meters. |
Weapon |
| Perfected Point-Blank Snipe |
2 perfected items: Adds 2-103 Weapon and Spell Damage |
Weapon |
| Void Bash |
2 items: When you deal damage with Power Bash, you apply Call of the Void to yourself for 2 seconds. Enemies within 12 meters are immediately pulled to you. After Call of the Void ends, you apply Major Maim to enemies in the area for 10 seconds, reducing their damage done by 10%. This effect can occur once every 13 seconds. |
Weapon |
| Perfected Void Bash |
2 perfected items: Adds 22-965 Maximum Health |
Weapon |
| Wrath of Elements |
2 items: Casting Weakness to Elements on a target within 15 meters of you causes a surge of elemental energy to tether between you for 10 seconds. While the tether persists, enemies touching the tether take 331 Flame Damage, 331 Shock Damage, or 331 Frost Damage every 1 second, which increases by 1% each time it deals damage, up to 20%. This effect can occur once every 10 seconds, and scales off the higher of your Weapon and Spell Damage. |
Weapon |
| Perfected Wrath of Elements |
2 perfected items: Adds 27-1190 Offensive Penetration |
Weapon |
Achievements[edit]
There are 20 achievements associated with this arena:
| Achievement | Points | Description | Reward
| |
|---|---|---|---|---|
| Needed for Hero of the Unending Song | ||||
| Hero of the Unending Song | 50 | Complete the listed achievements for Vateshran Hollows. | Title: of the Undying Song | |
| Vateshran Hollows Conqueror | 50 | Defeat all challengers in Veteran Vateshran Hollows. | Bust: Maebroogha (page) Skin: Void Pathosis Title: Spiritblood Champion | |
| Crushing Disappointment | 10 | Defeat Zakuryn the Sculptor and Flesh Abomination after destroying 5 or more Banekin with a single blow from the Flesh Abomination's Pulverize three times in Veteran Vateshran Hollow. | ||
| A Blinding Flash | 10 | Destroy 5 Watchers within a single Wounding Portal during the Iozuzzunth battle in Veteran Vateshran Hollows. | ||
| Give That Back | 10 | Retrieve a stolen "Blessing of the Grove" buff from a Blessed Spriggan 20 times in Veteran Vateshran Hollows. | ||
| You Missed! | 10 | Avoid Rahdgarak's blockable Clobber attack by grappling away from it in Veteran Vateshran Hollows. | ||
| Dormant Defeat | 10 | Defeat the Magma Queen while never sealing a dormant volcano in Veteran Vateshran Hollows. | ||
| Fire in the Belly | 10 | Absorb 20 pyres ignited by the Pyrelord in Veteran Vateshran Hollows. | ||
| Missed Me by That Much | 10 | Defeat Maebroogha the Void Lich after only destroying Void Trap Shades while they are being detonated. | ||
| Unbroken Vigor | 50 | Complete Veteran Vateshran Hollows in a single attempt without dying or leaving the arena. | ||
| Hollows Hustler | 50 | Complete Veteran Vateshran Hollows within 45 minutes. The timer starts when entering any wing for the first time. | ||
| Strength from Within | 50 | Complete Veteran Vateshran Hollows without using Sigils during combat. |
| |
| Needed for Honor to the Spiritblood | ||||
| Honor to the Spiritblood | 50 | Complete the listed achievements for Vateshran Hollows. | ||
| Scattered Spirits | 10 | Locate the three missing Essences throughout Vateshran Hollows and collect every Remnant of each type. | ||
| Seeker of the Hollows | 10 | Locate and defeat all of the hidden challengers in Vateshran Hollows. | ||
| Fire Walker | 10 | Using any Brimstone Orb, travel ten kilometers through lava. | ||
| Trapped Between Worlds | 10 | Spend 10 minutes affected by the Wounding Portal. | ||
| High Flyer | 10 | Grapple 500 times. |
| |
| Normal | ||||
| Vateshran Hollows Vanquisher | 15 | Defeat all challengers in Vateshran Hollows. | Trophy: Maebroogha (page)
| |
| Veteran | ||||
| The Vateshran's Chosen | 50 | Complete Veteran Vateshran Hollows within 45 minutes without using a single Sigil and without dying. The timer starts when entering any wing for the first time. | Title: Spirit Slayer | |
Maps[edit]
Gallery[edit]
Hunter's Grotto
The Brimstone Den
The Wounding
Champion's Circle
