Online:Gathwen
| Gathwen | |||
|---|---|---|---|
| Location | Temple of the Mourning Springs, Mistral Elden Root Two Moons Path The Chasm |
||
| Race | Wood Elf | Gender | Female |
| Health | 29,870(During The Citadel Must Fall) |
||
| Reaction | Friendly | ||
| Other Information | |||
| Follower | Tears of the Two Moons The Tempest Unleashed (optional) |
||
| Faction(s) | Aldmeri Dominion | ||
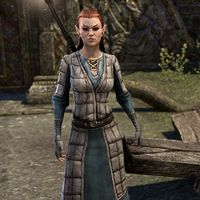
Gathwen is a Wood Elf mage apprenticed to the renowned Rurelion. She is fiercely loyal, and enlists your help in rescuing him from an ancient Khajiit temple. Depending on your choices made in the relevant quest, you might meet her later on in Elden Root.
She is later found in Coldharbour, helping with the invasion.
Related Quests[edit]
 Tears of the Two Moons: Investigate restless skeletons and stop a malevolent spirit.
 The Tempest Unleashed: Stop a summoned storm from destroying Mistral.
 The Den of Lorkhaj: Help the Lunar Champion walk the final, dark path.
 Crossing the Chasm: Secure the Chasm and gain access to Molag Bal's personal domain.
 The Harvest Heart: Eliminate or ally with the enslaved vampires of the Orchard.
 The Citadel Must Fall: Storm the Dremora defenses to reach the Endless Stair.
Quest-Related Events[edit]
Tears of the Two Moons[edit]
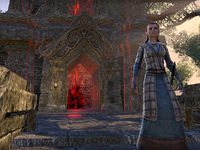
Gathwen will approach you as you get near the temple: "Please, a moment." Talk to her to see what she wants.
- "Please, I need your help. My master's life is in danger!"
- What happened?
- "I'm part of an expedition from Eagle's Strand. While we explored the Temple of the Mourning Springs, the dead began to rise. The others fled, but my master never emerged.
Rurelion taught me to know when I should ask for help. Well, I'm asking." - What do you need me to do?
- "Two magical wards seal the temple, marked by emblems of a scorpion and a spider. If you can keep the undead away while I disrupt the wards, we can search for Rurelion together.
How about it?" - All right. I'll help you disrupt the wards.
After agreeing to help her, you can ask further questions.
- "I have no doubt Rurelion can protect himself, but if he's trapped inside we need to get him out."
- Why were you in the temple?
- "My master and I had little to do after the shipwreck. When the locals mentioned a temple where the fountains never run dry, we leapt at the chance to investigate. Ealcil insisted on leading, of course."
Your reply will differ depending on whether you have met Ealcil previously.
- Who is Ealcil? (Have not met him.)
- "A contemporary of my master. A rival, really. Ealcil found a strange relic inside the temple called a "Mourning Stone." He was barely able to remove it before the undead struck. I think he brought it to Eagle's Strand."
- Ealcil was studying a Mourning Stone at Eagle's Strand. (Met him before.)
- "Ah, so you've met him. My master calls him "Eel-Kill." Something about an experiment gone wrong, many years ago.
The Mourning Stone you saw came from this temple. Ealcil was barely able to remove it before the undead fell upon us."
In both cases, the following dialogue is the same:
- Did you learn anything about the Mourning Stone?
- "Rurelion thought it could be used to control the weather, perhaps prevent another hurricane. Ealcil disagreed, of course. He insisted on studying it further at Eagle's Strand."
If you leave the premises of the temple grounds, she'll remind you to come back:
- Gathwen: "Where are you going? The temple is the other way, come back here."
Gathwen will then become your follower as you lead her around the temple grounds. When you reach the stairs to the temple, a skeleton who apparently captured Rurelion will stop you. Once you have spoken with it she will comment:
- Gathwen: "That can't be good. We need to get those wards down, fast!"
Talking to her again before disrupting the wards, she'll say:
- "The wards blocking the temple doors are located on opposite sides of the courtyard. We should hurry."
As she disrupts the wards, she'll say:
- Gathwen: "Watch for undead. I'll disrupt the ward."
- Gathwen: "This ward won't keep us out for long!"
Once the wards are down you can enter the catatombs, where you will be confronted by a puzzle involving the moon phases. If you talk with her she will speculate about the barrier.
- "That barrier must have activated when the dead began to rise.
It looks like the cycle of the two moons is important, somehow. Perhaps that's the key to disrupting the barrier!"
If you make a mistake she will call out:
- Gathwen: "Hmm … the cycle of the two moons seems to be the key to dispersing the barrier."
Solve the puzzle and she'll say:
- Gathwen:"The barrier is down! But before we proceed, I need to speak with you."
Talk to her by the entrance and see what she wants to say.
- "When we entered the temple, that skeleton made it sound as though Rurelion was in grave danger.
I won't let vague threats keep us from my master, but Rurelion is too important to lose. Perhaps we should think before we act." - Why is Rurelion so important?
- "The Dominion relies on Rurelion for his sound judgment. He's taught countless students the ways of magicka, including some of the Queen's own advisors. His role in the invasion is paramount for our future success.
If anything were to happen to him …." - I'll do what I can to protect Rurelion.
- "Thank you. We should keep moving."
If you talk with her afterwards, she will say:
- "If Rurelion is truly in danger, we should tread carefully."
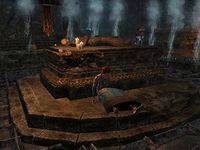
Once you enter the courtyard Gathwen will notice her mentor standing on a pedestal.
- Gathwen: "We found the Mourning Stone on that pedestal. Wait, that's Rurelion! What's he doing up there?"
Talk to the person who looks like Rurelion and discover that it's actually Uldor, possessing the Altmer mage. Once you have spoken with him Gathwen will say:
- Gathwen: "Leave Rurelion for now. We have to disrupt the summoning ritual! I'll destroy the bone piles if you keep the undead at bay."
Gathwen will destroy the bone piles they emerge from while you fight the skeletons themselves. As she destroys the piles one after the other, she'll say:
- Gathwen: "It'll take a moment to weaken the circle. Keep the undead away from me!"
- Gathwen: "It's working! I'll weaken the next circle."
- Gathwen: "One last circle! We can do this. We must do this!"
- Gathwen: "Go, help my master! I'm right behind you."
If you took some damage, she will heal you:
- Gathwen: "One moment, I'll bind your wounds."
- Gathwen: "May the Eight protect you."
If you talk to her while she is disrupting the circles, she'll be agitated:
- "No time to talk! We have to stop the summoning ritual!"
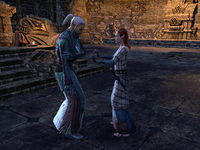
You find Rurelion inside, who shares his plan to defeat Uldor. By switching a lever, you can let Gathwen reach you both in safety. She does not agree to her master's plan:
- Gathwen: "Master, I know what you're planning. I won't let you throw your life away!"
She will beg you to reconsider:
- "Rurelion's plan is to let Uldor possess him! They'll both be sealed in the tomb, forever.
But it doesn't need to be this way. Seal me inside." - Why should you take your master's place?
- "Rurelion is too important for the Dominion to lose. Besides, we both saw how the summoning ritual weakened my master."
- I don't know about this.
- "Please, help me convince Rurelion! I will gladly seal myself in the tomb to spare my master. Uldor is a threat to all on this island."
Ends Conversation
- "Thank you. I should prepare myself."
- I'm ready when you are.
If you return to her after speaking with Rurelion she will still be adamant.
- "Nothing you say will convince me. I'm sealing myself in that tomb."
- "Then it's decided."
- I'm ready.
- "And he calls me stubborn.
All right."
Rurelion[edit]
If you chose Rurelion to be sealed in with Uldor, they will part with the following:
- Gathwen: "You can't do this, master!"
- Rurelion: "The Dominion will thrive without me. It's far stronger than it knows."
- Gathwen: "Then I should recover the Mourning Stone. Farewell, Rurelion. I..."
- Rurelion: "I know, Gathwen. I know."
After all is done you can talk to her.
- "It's done, isn't it? Rurelion is sealed inside with that monster."
- Rurelion saved everyone on this island.
- "Forgive me. Uldor couldn't be allowed to roam free. Something had to be done, and you had the strength to see what I could not."
- What will you do now?
- "I'll ensure the Mourning Stone remains guarded at all times. I should make a full report so the Dominion understands the danger of Uldor's capabilities."
- What about Rurelion?
- "No good comes from dwelling on the past. Rurelion lives, which means there's hope. He's a great man, a good man. I don't care how long it takes. I'll find a way to free him from that monster."
This completes the quest and you receive the Mourning Bow.
If you exit out of the conversation before turning in the quest, your dialogue slightly changes.
- "It's done, isn't it? Rurelion is sealed inside with that monster."
- What will you do next? (Leads to quest completion dialogue)
If you continue to speak with her, she can create a portal for you.
- "Forgive me. You did so much to help a stranger. I won't forget. I can open a portal to the temple courtyard, if you wish."
- I'd appreciate that.
- "There you go. Hurry, it won't remain open for long." Return through the portal to the temple courtyard.
Gathwen[edit]
If you chose Gathwen as the one to hold Uldor, Rurelion and Gathwen will say farewell.
- Rurelion: "Gathwen, I beg you to reconsider."
- Gathwen: "You're too important, Rurelion. If the Dominion lost you, we would be lost."
- Rurelion: "Then I'll recover the Mourning Stone. Farewell, my dearest friend."
Rurelion disappears into a portal.
- Gathwen: "Farewell, Rurelion."
If you talk to her right after this, she'll say, "Give me a moment to prepare myself. Go on ahead, I'll be right behind you."
Enter the tomb. She will have the following conversation with Uldor inside his tomb:
- Uldor: "You! I won't wear a poisoned outfit."
- Gathwen: "Uldor, my master was a fool to doubt your power. I'll help you wreak the vengeance you seek, if you allow me."
- Uldor: "Such a spectacular, willing garment! Very well."
Uldor possesses Gathwen.
- Gathwen: "I can't fight him for long! Quickly, place the Tears of the Two Moons in the pedestals!"
- Uldor: "Wretched fool! I'll turn your friend to ash!"
After you placed the Tears on the pedestals, Gathwen will be sitting exhausted next to Uldor's original body.
- "The water weakens Uldor, but I can't hold him for long. Quickly, go to Rurelion. Tell him I did what must be done."
- What about you?
- "I know Uldor will keep me alive. He far prefers a living form to the dead. Strange, how can I know this?
I feel him stirring within me. Help Rurelion restore the Mourning Stone. Go, while you still can!" - Farewell, Gathwen.
If you try to talk to her one last time, she'll say: "I can't hold him for long. Go, before he overtakes me. Tell my master we were successful."
The Tempest Unleashed[edit]
If you completed the previous quest and chose Rurelion to be entombed with Uldor, you can enlist her help in protecting Cat's Eye Quay.
- "Not one Sea Viper will make it through this door."
- What are you doing here?
- "I went to the Maormer embassy. I thought they might know a method to free Rurelion from the Temple of the Mourning Springs. Instead, I found them attacking Cat's Eye Quay.
I couldn't stand by and let that happen."
After speaking to Sergeant Firion and telling Firion that you might need the use of a mage, Gathwen will tell you:
- "You aided me at the Temple of the Mourning Springs. I'd be a fool not to return the favor. Whatever the Sea Vipers plan, we should hurry."
- Are you sure you want to do this?
- "You've already proven your courage. If I'm to die in this battle, I'd rather it be at your side than alone on this beach.
But we won't let it come to that. If you can hold the Sea Vipers' attention, I'll do what I can to keep you on your feet."
- "Then let's go. There'll be no more death at Maormer hands."
- "Think quickly. I can't tell what magics the Sea Vipers are brewing, but I know they can't be good for Mistral."
If you didn't choose her to accompany you:
- "I swear, no Maormer will make it past me."
Inside the quay, she'll say:
- "I suggest we search for survivors. In these situations most people will try to stay hidden. Perhaps the buildings will yield results."`
Inside Wind Tunnel, she'll say:
- "If I never see Ealcil again, it'll be too soon."
After successfully completing Ealcil's experiment, she'll be nearly in shock:
- "Ealcil's plan worked. I don't know what to say."
After speaking to Ealcil again, she'll say:
- "Ealcil may be right. We should channel the energies away from those Storm Totems."
But as soon as you're out of earshot of the pompous mage, she'll remark:
- Gathwen : "I can't stand that man."
Back outside the two of you will see the summoning ritual:
- Gathwen : "I've read about such things, but the books don't do it justice."
Speak to her and she'll say:
- "We should stop the Sea Viper ritual before they destroy all life on Khenarthi's Roost. It never gets easier, does it?"
After the quest, she'll be found on the beach.
- "You're quite handy at defeating Maormer sorcery. I hope to see you again. Hopefully, with Rurelion at my side."
The Den of Lorkhaj[edit]
After the quest, she will be in front of the Temple of the Two Moons Path. She congratulates you on walking the Path with the Mane.
- "Impressive work. Very impressive work indeed!"
Crossing the Chasm[edit]
Gathwen can be met in Coldharbour at the Chasm as she takes part in the push towards Molag Bal's lair and the planar vortex. If you talk with her she can give advice about what forces you will face in the Chasm.
- "That strange knight says the oddest things. But Vanus and the King seem to trust him, so what can you do?
You must be the champion that King Dynar said would lead us across the Chasm." - What have you learned about the Chasm?
- "The Chasm presents a formidable gauntlet of defenders and fortified installations. The first major obstacle is the portal that provides access to the Chasm's upper tier.
We have no chance of controlling that portal while the focus stones are active." - Tell me about the Chasm's defenders.
- What happens after I destroy the focus stones?
- "We take control of the portal to the upper tier and push forward. We haven't been able to scout the higher region, but Cadwell claims that Molag Bal's daughter, Molag Grunda, commands the gatehouse."
- Molag Bal has a daughter?
- "According to the legends, yes. She's a Winged Twilight. Strong, disgusting, and in charge of a small army. This won't be easy.
Darien says he's going to charm the wings right off her, but I'm not sure I like what he's insinuating."
If you met her previously in Tamriel and did not choose her to be entombed with Uldor, the following additional dialogue is available:
- Can I ask you about something else?
- "Of course, but please hurry. We're already taking losses and the bulk of the army hasn't even arrived yet.
And I'm having a hard time keeping Cadwell and Darien from rushing into battle all by themselves."- Were you able to free Rurelion?
If Rurelion held Uldor within his prison:
- "My dear master and friend was freed from Uldor, though the process wasn't easy. Undoing Uldor's bindings took time, but I learned much along the way. And, thankfully, Rurelion was restored."
If Gathwen held Uldor within his prison:
- "My dear master dedicated his great intellect and energies toward finding a way to free me. The experience was … not something I care to dwell on. It made me a much stronger mage, though.
I suppose there was value to living through the ordeal."
- "My dear master dedicated his great intellect and energies toward finding a way to free me. The experience was … not something I care to dwell on. It made me a much stronger mage, though.
Once you destroy the focus stones, Gathwen and Cadwell will be waiting for you at the portal to the next tier.
- "You did it! The portal is ours now!
Darien Gautier and Walks-in-Ash have already led troops through to the other side." - They already went through the portal?
- "Darien was impatient. As soon as you broke the seals, he took some troops and went through the portal. Walks-in-Ash went along to keep him out of too much trouble.
I'll use illusions to scout ahead and see what's waiting for us at the gatehouse."
If you speak to her again after asking her a few questions, she'll say:
- "We won't be able to use the portal until someone destroys those focus stones."
If you abandon the quest inside the chasm and speak to her here, she'll say:
- "The only way to reach Molag Bal's planar vortex is to take control of the Chasm."
After the three of you enter the portal, Gathwen will give orders to the Romori brothers before leaving to scout further on.
- Gathwen: "Denthis, Dithis! You two guard the portal. Tell anyone coming through to push ahead. The source of the reinforcements must be cut off!"
- Gathwen: "I'll scout on ahead. We need to know what we're going to face at that gatehouse."
If you go to the bridge leading up to the gatehouse before destroying the two reinforcement portals, you'll find Gathwen taking down a blue barrier as she is guarded by either Captain Arakh or a generic Fighters Guild Captain, depending on whether or not you rescued the Fighters from the Tower of Lies. If you speak to her here, she says:
- "Let me work on this barrier, you help stop the daedra coming through the portals!"
When you have destroyed the two portals, Gathwen will be waiting for you at base of the stairs leading up to the Gatehouse.
- Gathwen: "I got the barrier down. Molag Grunda has to know we're coming. The Chasm is nearly ours!"
- Gathwen: "I'm going to see who needs help back by the portals. Cadwell is up at the Gatehouse. The two of you can deal with Molag Grunda."
The Harvest Heart[edit]
Once the situation at the Orchard is rectified, Gathwen will appear then run off.
- Gathwen: "Another successful mission, but we're not finished yet!"
If you follow Gathwen and speak with her, she will update your map with the location of the Reaver Citadel, the Lost Fleet, and the Manor of Revelry.
- "Just the person I was looking for. King Dynar is rallying our forces near the Reaver Citadel."
- We're ready to make the next assault?
- "Yes. King Dynar and our forces are preparing to attack the Reaver Citadel to the north.
- And on my way to find you, I noticed a strange shipyard to the east and a Redguard settlement to the west."
- You saw a shipyard?
- "It was the strangest sight! More shipwrecks than a shipyard, really. It was as if they just fell out of the sky.
And there was an awful lot of them." - Did you notice anything else?
- "Other than a massive graveyard of ships of various designs spread across the valley to the east of here?
No, not really."
- "It was the strangest sight! More shipwrecks than a shipyard, really. It was as if they just fell out of the sky.
- Tell me more about the Reaver Citadel.
- "It's Molag Bal's last line of defense before we reach his inner sanctum, and it's certainly his most powerful. The Dremora stationed there have turned it into a heavily fortified city."
- And King Dynar's ready to move against it?
- "Not quite, but soon. He's waiting for you and a few of the others to meet up with him. They're gathering on the land bridge just to the north.
I'm going to head in that direction as soon as we're done here."
- What's a Redguard settlement doing here?
- "Oh, I doubt it's an actual settlement. That's just what the architecture reminded me of.
I wasn't able to get too close, but I swear I heard music coming from that direction." - What kind of music?
- "You know, it sounded very festive to me. Isn't that strange, in a place like this? What could any of these soul shriven have to be happy about?"
- "Oh, I doubt it's an actual settlement. That's just what the architecture reminded me of.
The Citadel Must Fall[edit]
As she mentions earlier, she will be on the land bridge with King Dynar and the others, just outside the Citadel.
- "We've come too far to be stopped by a few walls."
Once The Citadel Must Fall is started you can ask her:
- "There's bound to be a way into that place. I mean, besides the front door. I imagine there are a lot of Dremora waiting on the other side of the gate."
- Are you ready to tackle the Reaver Citadel?
- "It's pretty imposing, I'd be lying if I didn't say I was a little nervous about this campaign.
Master Rurelion always says that a true mage should never get overconfident. A little fear just makes you prepare better."
After you have helped the forces gain control of the Citadel, Gathwen will be with Cadwell and Lyranth outside the Reaver Citadel Pyramid entrance. She will be unsure of the latter.
- "I wonder what Rurelion would say if he knew I was this close to a Dremora?
But to be completely honest with you, she makes me a little nervous." - I need to get into the pyramid.
- "Absolutely! And I'll be right by your side.
Assuming that Dremora is telling the truth and really opens the way for us. She appears to want to help, but I don't entirely trust her."
Once Lyranth unlocks the door with her blood, Gathwen will be ready to fight at your side.
- "I may not like her, but your Dremora friend has certainly been good to her word. She used her own blood to open the door for us. I've never seen anything like it.
Well, off with you! And remember, we'll be right behind you."
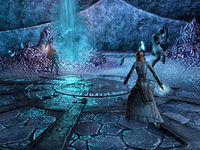
When you enter the Pyramid, you will be confronted by the Titan Djanax.
- Gathwen: "Jode's bones! What is that thing?"
After you exit the pyramid, you may speak with Gathwen:
- "That was … different. After we took down that titan and the Valkynaz, all those Dremora appeared.
I think your Dremora friend is establishing her dominance. She threw Cadwell and I out, which was kind of rude, but what can you do?"
After you have slain Valkynaz Seris, Gathwen will be near the entrance to the Labyrinth. She will be surveying her collection of troops, which may include Everfull Patrons, Fleet Soldiers, Uxith Warriors or Lamias.
- "Vanus wants me to round up this interesting bunch and lead them into the battle. This should be … challenging? Yes, that's a word.
I understand you're going in ahead of us. Be careful in there. And leave a few Daedra for us to deal with!"
Dialogue[edit]
Elden Root[edit]
Outside the quests, Gathwen will be in Elden Root Mages guild if Rurelion sacrificed himself. She will be speaking to Ealcil:
- Gathwen: "Have you found the tome?"
- Ealcil: "Keep your robes on. I'll get to it as soon as I can."
- Gathwen: "I know, I know…I'll keep looking."
Speaking to her:
- "It's good to see you. Ealcil has been assisting me with a … certain project. Before long, Rurelion will be free to leave Khenarthi's Roost.
Soon, I'm certain of it."
Later on, if you return to the guild hall, you will find both Ealcil and Rurelion with her, the project having succeeded:[verification needed — not sure what causes it to change]
- "It's good to have Rurelion back in Elden Root. I thought he would be trapped in the Temple of the Mourning Springs until I was old and gray.
But that isn't the case. He's here, right now. Safe."
Notes[edit]
- At the Chasm, Gathwen can still be asked if she freed Rurelion even if he was met freed already with her in Elden Root.
