Online:The Final Assault
| This page is currently being rewritten as part of the Online Quest Project. The page is being both written and checked. All users are welcome to make changes to the page. If you make a change that is relevant to the project, please update this template accordingly, and make sure you have observed the project guidelines. Detail Quick Summary: written by Runs-in-Rivers, checked by MolagBallet
Quest Stages: written by Rhynchelma, not checked |
|
Quick Walkthrough[edit]
- Talk to Gabrielle Benele and Hahnin.
- Choose either Cadwell, Darien Gautier, Skordo the Knife or Tzik'nith to accompany you.
- Talk to King Laloriaran Dynar.
- Close the reinforcement portal.
- Talk to Vanus Galerion then enter the Labyrinth.
- Make your way through the Labyrinth.
- Talk to Vanus Galerion.
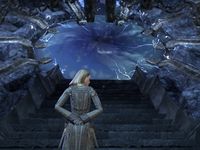
- Find the Planar Vortex Portal, talk to the Groundskeeper, then enter the portal.
- (Optional) Talk to your companions
- Let Meridia know you're ready.
- Destroy the remaining Dark Anchors.
- Confront the Council of Molag Bal.
- Defeat Molag Bal's minions, then activate the Light.
- Talk to Meridia and then King Dynar.
Detailed Walkthrough[edit]
Talk to Vanus Galerion near the Endless Stair wayshrine. You need to open the Labyrinth before the entire army enters. You need to speak to Hahnin and Gabrielle to learn about the Guilds' strike teams following you.
Gabrielle Benele is to the west. She says you will need to close Molag Bal's reinforcement portal before you open the Labyrinth.
Hahnin, who is to the east, allows you to choose a companion if you want. However, you cannot choose Hahnin. Depending on your progression and decisions in Coldharbour, you can choose between Cadwell, Darien Gautier, Skordo the Knife or Tzik'nith.
Talk to King Laloriaran Dynar once you have chosen your companion. He will give a speech, mentioning your companion and your tasks.
The Reinforcement Portal[edit]
Inside the Endless Stair, you first need to close the reinforcement portal. If you have completed the Cliffs of Failure, the person you sided with will await you and offer some kind of aid:
- Angof gives you a seed which you can use on the bodies of dead Dremora to turn them into a helpful zombie.
- Estre gives you the Mask of Shadows which lets you summon the Shadow Court Jester to fight enemies.
- Thallik will let you use his death rune again.
Once you get to the reinforcement portal area, you need to kill the Guardian of the Gate to be able to close the portal. If you sided with the vampires at the Harvest Heart, a group of them will come to your aid.
The Library Gate[edit]
As you approach the Labyrinth, Vanus Galerion will appear. Gabrielle and her mages will accompany you in the Labyrinth. Talk to her inside the Labyrinth. You need to find some way to open the library gate.
Talk to Malkur Valos. He says the tubes on the walls are daedric devices that need power to operate. You need to figure out how to move the blue flames over to the openings of the tubes.
Talk to Raynor Vanos. He says touching the braziers will allow you to move the flame.
Touch the brazier, then use the daedric flame. The Cold Fire Brazier option will appear when you look at the openings on the walls. Once all four pipes are lit, you will be able to enter the next area.
The Dark Chamber[edit]
Cross the bridge, and enter the dark chamber, an area so dark you can barely see. If you have completed The Soul-Meld Mage, Gadris or Zur will be there to provide illumination. Otherwise, you may follow the braziers as they light up. Using Magelight or Almalexia's Enchanted Lantern will also work.
The Statue Room[edit]
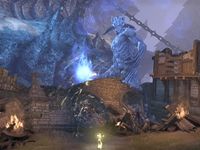
Cross the bridge, then enter the statue room. Stay close to Gabrielle, and cross to the other side of the statue room. She feels like something bad will happen, and the stone statues start to attack both of you.
Gabrielle leads you to the southwest. There is a door to the Endless Stair, but it is shut with magic. Gabrielle will open the door, but you need to protect her.
Unfortunately, the door shuts behind you and Gabrielle. The others are trapped for now. Vanus Galerion sends you to the Planar Vortex Portal. Faraniel and the Shadow Walkers appear to help fight.
Defeat the enemies in your way, then talk to the Gatekeeper who appears before the portal. She says you need to enter the Planar Vortex, destroy the Dark Anchors and unleash the power of the Light of Meridia at the focal point of the Planemeld.
The Planar Vortex[edit]
You enter the Planar Vortex portal and see a Dark Anchor. The Groundskeeper turns into Meridia and destroys it. Darien, Gabrielle, King Dynar, Cadwell, Kireth and Raynor Vanos, and Faraniel or Tzik'nith will enter through the portal.
She lets you talk to your allies, then you let her know you are ready and you destroy the two remaining Dark Anchors. Your allies will follow your lead, but the Vanos siblings will stay behind to guard the portal. As you continue on, Molag Bal will arise from behind the wall and have the following exchange:
- Meridia: "We have to hurry! Molag Bal knows we're here!"
- Molag Bal: "I grow weary of your games, Meridia."
- Meridia: "Go, Warriors of Light! These dark chains must be broken!"
- Molag Bal: "You cannot stop me, Meridia. This realm will be mine!"
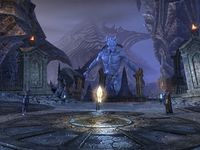
Bal will then hurl fireballs at you, with Meridia stopping it using a shield. You and your allies must continue to the next dark anchor and destroy it, then continue up the steps. At the top, Molag Bal's council will be present with a Light of Meridia:
- Clorsatari: "The light approaches. It brightens the shadows. It attempts to break the darkness."
- Verkynvayl: "Our father approaches. He will consume the light. He will tear it apart. He will destroy it. He will destroy you!"
- Clorsatari: "Our father has spoken. He wishes us to challenge you and you alone."
- King Laloriaran Dynar: "What... what's going on? No!"
- Molag Bal: "You believe that light can destroy my Planemeld? Your Prince thinks I would allow this? She is more foolish than I thought."
- Clorsatari: "I live to serve. It will be my pleasure to destroy this one, my lord."
- Molag Bal: "Oh, how sad. You were drafted into a war you could never win. My council shall destroy you. I shall enjoy watching a hero die!"
- Molag Bal: "Most curious. This light powers you somehow. Meridia... where are you hiding?"
- Meridia: "Merely fetching those who would stand against you."
- Molag Bal: "I tire of this game. Now you shall die!"
- Meridia: "Quickly, get behind my shield!"
- Molag Bal: "Did you think it would be that easy? My minions will tear you apart."
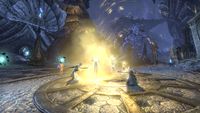
You destroy Molag Bal's Council (Clorsatari, Kehothar and Verkynvayl) one by one as they discuss what to do about the Light of Meridia. Molag Bal appears behind them, but Meridia and your allies also appear. Meridia shields your group, and you, Darien, and King Dynar fight off Molag Bal's minions while Vanus and Gabrielle work on activating the Light of Meridia. Once their spell is complete, you must get into Meridia's shield, and will be teleported out of the Vortex.
A Pocket of Oblivion[edit]
You awaken back in the Hollow City, Meridia's pocket realm of Oblivion. Your friends who helped fight the final battle are alive, but the Ayleid King Laloriaran Dynar was gravely wounded and Darien has gone missing, as they were not fully within Meridia's shield.
Vanus and Gabrielle will be found alongside King Dynar. With his dying breath, the King gives you Ayleid's Wrath, a two-handed sword, as a gift from his people.
Notes[edit]
- There is no effect on you that appears to denote the Blessing of Haj Uxith being active once Treeminder Xohaneel applies it on you. However, the duration can be seen by viewing active buffs in the Character section.
- The blessing will only prevent mortal damage from combat-related injuries. It doesn't help with fall damage.
- Daedric braziers in the library can still be interacted with to gain blue flame in your hands after opening the gate. However, nothing can be done with it at this point.
- A majority of the animated statues that attack you in the dark chamber cannot be targeted and attacked. However, their attacks deal very little damage, so they don't pose much of a threat.
- Active companions are dismissed at random while venturing in the dark chamber.
- Despite having access to the Planar Vortex portal directly after exiting the Labyrinth, it cannot be used until reaching the related objective.
- Even if you sided with the lamias at the Moonless Walk, if you completed the optional objective needed to have Faraniel onboard, Faraniel takes priority over Tzik'nith when joining you in the Planar Vortex.
- During the objective to place the Light of Meridia, the objective descriptions state all the Dark Anchors have been destroyed, despite the last one not having been destroyed yet by Gabrielle and Darien.
- Standing in front of Meridia's shield and being hit by Molag Bal's fireballs doesn't inflict any damage.
- During the dark chamber phase, if you have Amelexia's Enchanted Light (memento) it will make traversing it much easier.
Bugs[edit]
- During the objective to unlock the Library Gate, all the objective markers displayed on the map are misplaced, appearing to be in the building north of the library instead of the library itself. ?
- During the objective to unlock the Library Gate, while the scholars state that you must aim for the entry point in the tubes precisely to activate them, aiming anywhere in the general vicinity (such as way above or way to the left or right, going as far as aiming into empty space) still displays the prompt to throw the fire ball. Using it then results in your character still accurately throwing the fireball into the tube and activating it. ?
- Using the gate to exit the library while standing very close to it brings you back to the way you used the prompt from, regardless of which side the gate is used. ?
- Fiend Statues vanish abruptly midway through attacking you as Gabrielle Benele moves around the Statue Room. ?
- Darien Gautier and King Laloriaran Dynar are the only ones with the follower icon above their heads while they follow you in the Planar Vortex. Cadwell, Faraniel/Tzik'nith, Gabrielle Benele and Vanus Galerion all lack it. ?
- Sometimes The Groundskeeper won't show up and the boss will keep respawning after dying. A logout/login cycle should fix this. ?
Quest Stages[edit]
<Alias=LocationHold>) is dynamically set by the game and will be filled in with the appropriate word(s) when seen in game.
- Not all Journal Entries may appear in your journal; which entries appear and which entries do not depends on the manner in which the quest is done.
- Stages are not always in order of progress. This is usually the case with quests that have multiple possible outcomes or quests where certain tasks may be done in any order. Some stages may therefore repeat objectives seen in other stages.
